(2013-07-10)
So far in my bread baking journey, I successfully created a wild yeast starter culture from just flour and water, and followed up with noble bread baking attempts, but with inconsistent and flawed results.
New Book purchase: Reinhart’s Bread Baker’s Apprentice
I decided that I wanted to understand the process a lot better, which would probably help me to execute better. The book that was talked about a lot as I read the different artisan bread baking blogs was “The Bread Baker’s Apprentice”, by Peter Reinhart. Peter teaches (taught?) at Johnson & Wales University, and his book was exactly what I was looking for. Other than glossing over the stretch-and-fold part, the breakdown of the process into twelve distinct phases really helped me to get a much better understanding of why I was doing what I was doing.
New Equipment update: baking stone
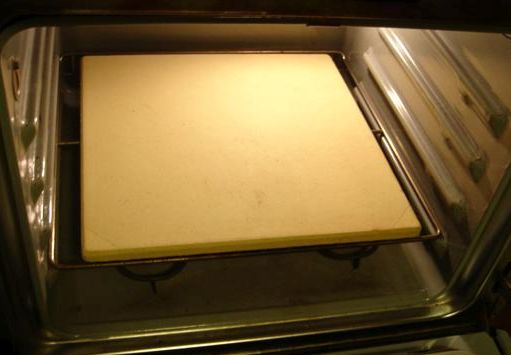
I had been on the hunt for a baking stone for awhile now. I was living in Dubai at the time, so it was not clear if they even sold baking stones in retail stores, and if they did which one would have it? The inverted cookie sheet that I was baking on did the job, but since it was a narrow rectangle, I’d have issues with the loaf sliding too far and off fthe back end, or fallling off the side, or the cookie sheet being too delicate to handle. I ended up getting some great advice from Khalid (Mebake) over at The Fresh Loaf, (Thanks again, Khalid!) of places I could find some good stones, and after a few stops I did find one!
The baking stone is an unglazed 35.5 x 45.5 cm square, 1.5 cm thick. It was by far the most critical kitchen purchase I made, and it definitely made the oven baking phase a much more pleasant experience. Having a good deck to slide free-standing loaves on was just what I needed to keep my energy up.
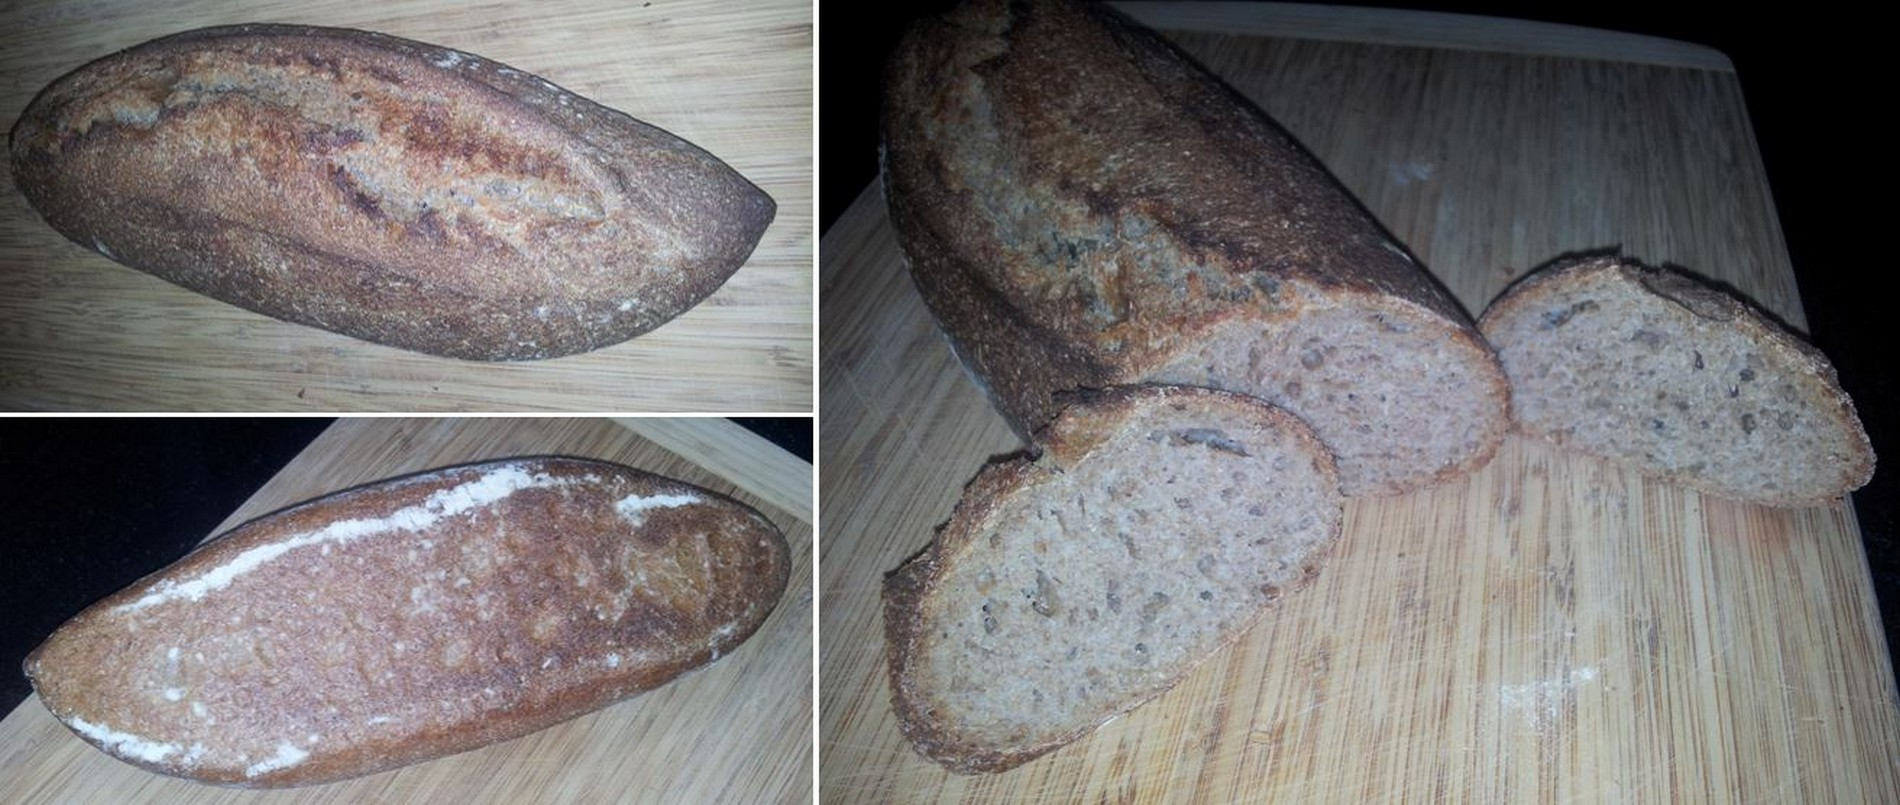
Making the loaf
The first bread I baked on the stone was my first attempt at a batard loaf – an oblong shape, tapered at both ends. Looks sort of loke an American football.
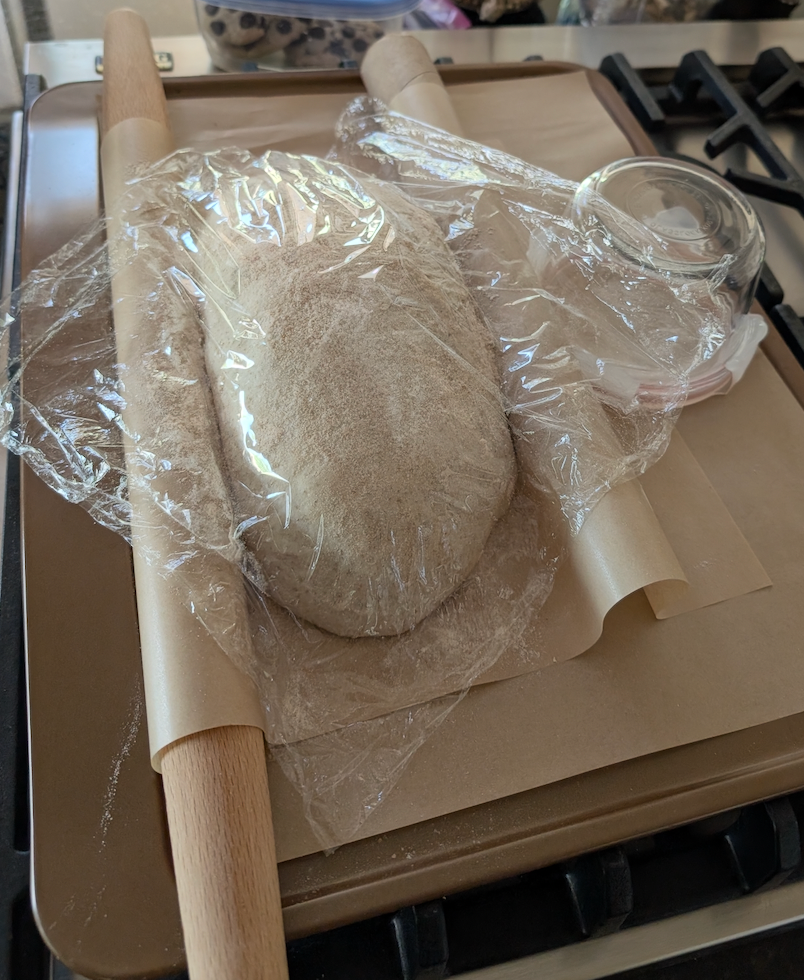
The recipe was the same whole wheat levain loaf formula from the Weekendbakery.com. I used Reinhart’s illustrations to shape up the batard loaf, and since I don’t have baking linen (couche) and also was not ready to purchase a banneton proofing bowl, I managed to get a good couche simulation by placing the shaped batard on parchment paper, and used two rolling pins secured with inverted whiskey glasses to provide support for the sides.
My technique worked out pretty well! The loaf was definitely my best result so far. The shape was not perfect, but still the target torpedo shape. The crust was a beautiful brown color. The bottom was cooked perfectly and not burnt. There was modest bloom from oven spring at the long slash mark, and the crumb was as open (holey) as could be expected from this formula which was heavy on the whole wheat flour.
It also tasted pretty good too 🙂
Now I am pumped up, ready to master the craft!
:: Equipment on hand:
:: – Scaling: Digital scale – Terraillon Carre Inox
:: – Levain container: Stainless Steel kitchen bowl
:: – Mixing: by hand
:: – Bulk Fermentation container: Stainless Steel kitchen bowll
:: – Dough Scraper/Cutter: Plastic scraper (new purchase!)
:: – Proofing: Glass kitchen bowl
:: – Baking: Unglazed baking stone